I see I haven't posted in over a year. Better late than never!
In an effort to help us commit more scripture to memory, I've been selecting verses and overlaying them on photos, which I post on the refrigerator for a week or so. Usually the photos are my own, but sometimes the verse I want to use doesn't fit with any photo in my library.
This photo is my own. It was taken on a recent trip to California.
I chose the verse as a reminder to stand for the Lord. Increasingly, people are demeaned, belittled and even persecuted for their religious beliefs. We must remember why it is so important to stand for Him, even if it's not popular.
My record of fun...food, drink, travel, entertainment, beauty and more...lightened up!
Tuesday, April 26, 2016
Friday, March 20, 2015
Salted Caramel Peanut Butter Ice Cream
Happy Spring! At last it's arrived! It's time to eat ice cream!
Who am I kidding? Eating ice cream is a daily occurrence for me, even in the dead of winter. Especially in the dead of winter, when it's something to look forward to after the cold and dreariness dog you. All. Day. Long. Of course, ice cream in winter must be followed by copious amounts of hot chocolate to warm back up. It's a vicious cycle. I'm a little insane that way.
The creamy smoothness of this ice cream is most certainly something to be enjoyed all year. I've made it three times since the idea came to me in the shower (the birthplace of all good ideas) and it will likely be made many more times, provided I can continue to find Jif's Whipped Peanut Butter & Salty Caramel Flavored Spread at the grocery store. It's dreamy (that applies to the spread AND the ice cream).
Salted Caramel Peanut Butter Ice Cream
Printer-friendly copy
2 cups heavy whipping cream
1 14-ounce can sweetened condensed milk
1 cup Jif Whipped Peanut Butter & Caramel Flavored Spread (or regular peanut butter of choice)
1/2 teaspoon Morton Fine Mediterranean Sea Salt
1/2 cup salted caramel, room temperature (commercial or homemade, or see below)
With a hand mixer, mix the cream, sweetened condensed milk, peanut butter and sea salt together in a large bowl or measuring cup until smooth. Pour into an ice cream mixer and process according to the manufacturer's directions. After the ice cream has been churned and has thickened pour into a freezer-safe container, alternating with the salted caramel to create a layered effect. Freeze for 2-3 hours. Remove container from freezer and allow to soften slightly prior to serving.
Salted Caramel Sauce
1 9-ounce bag Werther's Original Baking Caramels, unwrapped
1/2 cup milk
Place unwrapped caramels and milk in a medium microwave-safe bowl or measuring cup. Microwave at 30-second intervals, stirring in between, until caramels are completely melted and the sauce is smooth. Store covered in the refrigerator.
Who am I kidding? Eating ice cream is a daily occurrence for me, even in the dead of winter. Especially in the dead of winter, when it's something to look forward to after the cold and dreariness dog you. All. Day. Long. Of course, ice cream in winter must be followed by copious amounts of hot chocolate to warm back up. It's a vicious cycle. I'm a little insane that way.
The creamy smoothness of this ice cream is most certainly something to be enjoyed all year. I've made it three times since the idea came to me in the shower (the birthplace of all good ideas) and it will likely be made many more times, provided I can continue to find Jif's Whipped Peanut Butter & Salty Caramel Flavored Spread at the grocery store. It's dreamy (that applies to the spread AND the ice cream).
Salted Caramel Peanut Butter Ice Cream
Printer-friendly copy
2 cups heavy whipping cream
1 14-ounce can sweetened condensed milk
1 cup Jif Whipped Peanut Butter & Caramel Flavored Spread (or regular peanut butter of choice)
1/2 teaspoon Morton Fine Mediterranean Sea Salt
1/2 cup salted caramel, room temperature (commercial or homemade, or see below)
With a hand mixer, mix the cream, sweetened condensed milk, peanut butter and sea salt together in a large bowl or measuring cup until smooth. Pour into an ice cream mixer and process according to the manufacturer's directions. After the ice cream has been churned and has thickened pour into a freezer-safe container, alternating with the salted caramel to create a layered effect. Freeze for 2-3 hours. Remove container from freezer and allow to soften slightly prior to serving.
Salted Caramel Sauce
1 9-ounce bag Werther's Original Baking Caramels, unwrapped
1/2 cup milk
Place unwrapped caramels and milk in a medium microwave-safe bowl or measuring cup. Microwave at 30-second intervals, stirring in between, until caramels are completely melted and the sauce is smooth. Store covered in the refrigerator.
Friday, October 17, 2014
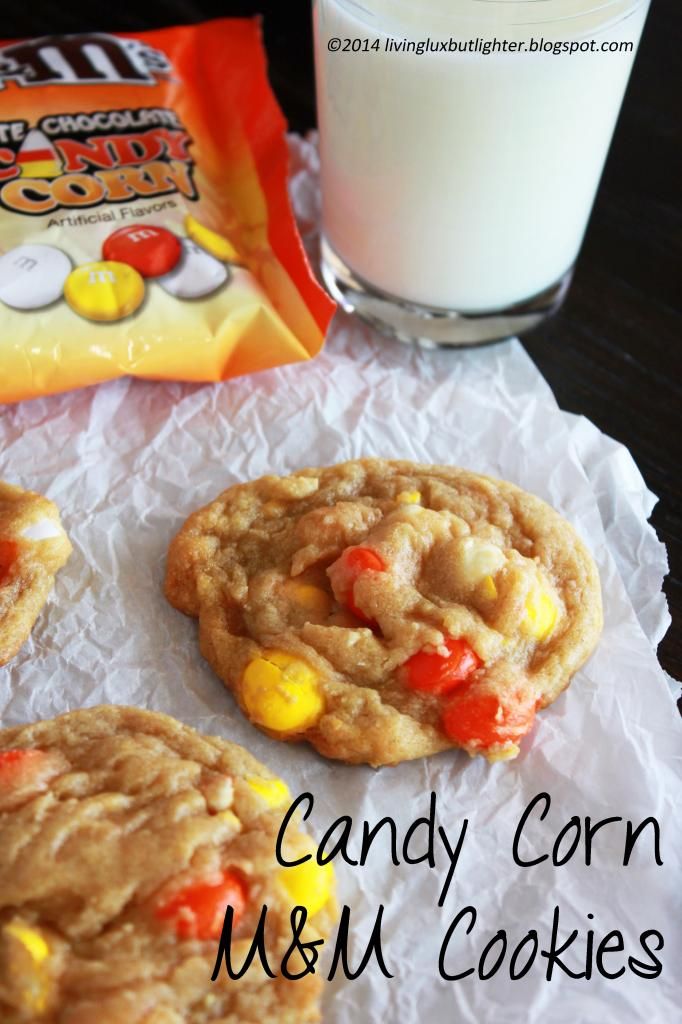
Candy Corn M&M Cookies
I never used to like candy corn. I have the biggest sweet tooth on the planet, but it's one of the very few candies I could skip by without batting an eye. So I'm not sure what ever possessed me to buy White Chocolate Candy Corn M&Ms. Perhaps it was the "white chocolate" part of White Chocolate Candy Corn (in fact, I'm pretty sure it was). I was rather unsure about them after my first taste. They were sort of weird...more white chocolate than candy corn, and the candy corn part I could taste wasn't BAD. I nibbled here and there over several days until...GASP. They were GONE. I guess I must have liked them!
That was last year. This year, I made the mistake of buying three bags at once. You know, they're seasonal, and I thought I should stock up. And save them. But then I pretty much inhaled bag #1 and I knew something needed to be done. I can't afford to be pounding bag after bag of M&Ms! I needed to pace myself. I decided to make cookies. I thought if these decadent morsels were in a cookie, I could limit myself to just one a day. A reasonable amount. Maybe?
Makes approximately 28 cookies
That was last year. This year, I made the mistake of buying three bags at once. You know, they're seasonal, and I thought I should stock up. And save them. But then I pretty much inhaled bag #1 and I knew something needed to be done. I can't afford to be pounding bag after bag of M&Ms! I needed to pace myself. I decided to make cookies. I thought if these decadent morsels were in a cookie, I could limit myself to just one a day. A reasonable amount. Maybe?
Candy Corn M&M Cookies
Adapted from Averie Cooks
Ingredients:
1 cup unsalted butter, softened (2 sticks)
1 cup granulated sugar
1 cup light brown sugar, packed
2 large eggs
2 tablespoons fat-free milk
4 teaspoons vanilla extract
2 cups all-purpose flour
1½ cups bread flour (makes cookies chewier)
2 teaspoons baking soda
½ teaspoon salt
1 9.9-ounce bag White Chocolate Candy Corn M&Ms
Directions:
Place the butter in a stand mixer or large bowl and beat on low speed until smooth. Add the sugars and cream until well-combined. Scrape down the sides of the bowl and add egg, milk, and vanilla extract and beat until light and fluffy. Add flours, baking soda and salt and mix until just combined. Add M&Ms and stir gently until incorporated. Transfer to an airtight container and refrigerate for a minimum of three hours.
Preheat oven to 350 degrees. Line a baking sheet with parchment or a non-stick silicone baking mat. Use a medium cookie scoop and place eight mounds of cookie dough on the baking sheet. Bake for 8-10 minutes or until the edges are just set and slightly golden in color. Remove the cookies from the oven and allow to cool on the baking sheet. The cookies will firm up as they cool. Repeat until all the dough has been utilized. Transfer cooled cookies to an airtight container for storage.
Makes approximately 28 cookies
Saturday, August 2, 2014
No Soliciting Sign
For some reason, we get a lot of solicitors in our neighborhood. A lot. It seems like rarely does a day go by when the doorbell isn't ringing and someone is on the porch trying to sell us something, the dog is going berserk, the boy wants to know who it is, chaos abounds, etcetera, etcetera. Ugh! I'd just rather not deal with it. And so I made a sign...
I got the plain wood sign at Hobby Lobby for $1.79 (using a 40% off coupon, of course), and also picked up some DecoArt Americana acrylic paint in Navy Blue. I painted the sign with a thin layer of paint, and once it was dry, sanded it with 220 sandpaper. The next step was to wipe it down with a damp paper towel to pick up all the wood and paint dust. Next, I painted a layer of Plaid FolkArt acrylic paint in Licorice, let it dry, and then sanded and wiped again. I repeated step one (for a third layer of paint), and once that had been sanded and wiped, I was ready to add my words.
I designed the words in Silhouette Studio. Once hubby and I agreed on the phrases and the fonts (Copperplate Goth and Pharmacy), I used my Cameo to cut the design on Oracal 631 White (010) vinyl. Weeding (removing unnecessary vinyl from the design) the Pharmacy font was tricky, because some of the letters are pretty narrow. I took my time and, amazingly, I didn't get too flustered. I applied the transfer paper, lined it up on the sign, and applied the vinyl to the wood.
I'm pretty pleased with how it turned out. Hubby promises to hang it near the doorbell. And then hopefully the new sign will work its magic!
Wednesday, July 23, 2014
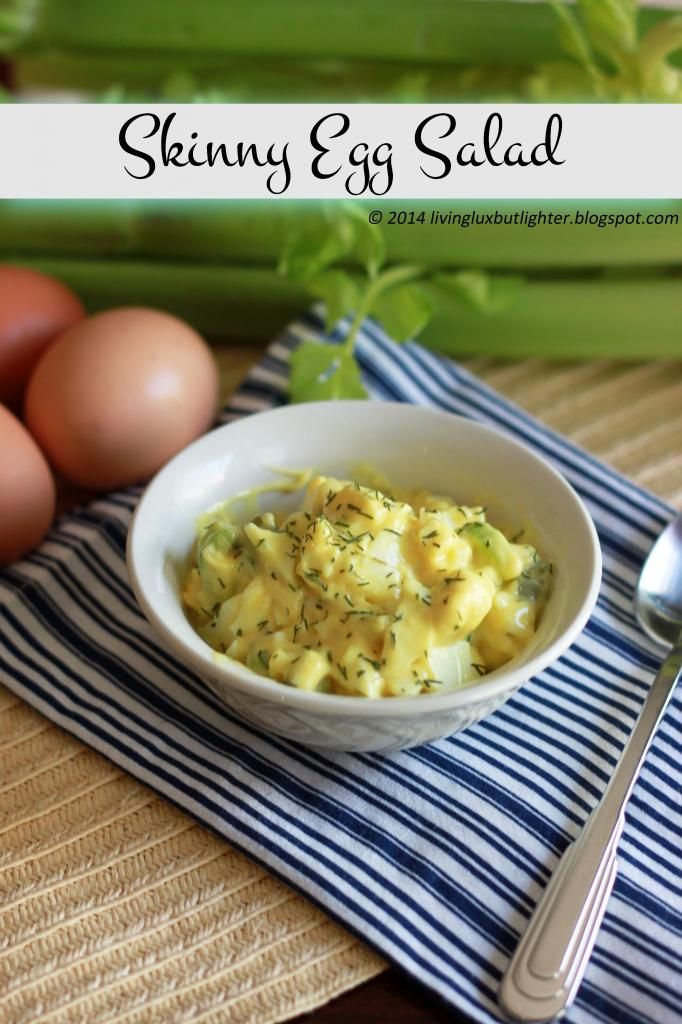
Skinny Egg Salad
We were on vacation earlier this month and I came home five pounds heavier. I hate how one can gain five pounds in a week and it takes five weeks (or more!) to take it off again. So I've been (trying to) cut back on calories and count EVERYTHING that goes into my mouth. Easier said than done! That also means making sure every bite will keep me feeling full. Satisfied. Not hungry!
This Skinny Egg Salad is high in protein, but low in calories, so it really fits the bill. And it's The Boy's birthday this week, so I'll need all the help I can get when we order in pizza and have cookie cake sitting around. Sigh!
Skinny Egg Salad
Adapted from Dashing Dish
Printer-friendly copy
Ingredients:
3 hard-cooked eggs (3 egg whites and 1 yolk, discard the other 2 yolks)
1/2 stalk celery, diced
1 mini dill pickle, chopped
1/4 cup Miracle Whip Light dressing
1/2 tsp. mustard
1 tsp. Penzey's Sunny Paris seasoning
Sprinkle of dried dill
Salt and ground pepper, to taste
Directions:
Coarsely chop three egg whites and one egg yolk and place them in a medium-sized bowl along with the celery and pickle. Set aside. In a small bowl, mix the light dressing, mustard, and seasonings. Pour the dressing mixture over the eggs and gently stir until completely mixed. Serve immediately by itself or on a flatbread. Refrigerate any leftovers.
Calories: Approximately 185 (entire recipe)
Serves: 2
This Skinny Egg Salad is high in protein, but low in calories, so it really fits the bill. And it's The Boy's birthday this week, so I'll need all the help I can get when we order in pizza and have cookie cake sitting around. Sigh!
Skinny Egg Salad
Adapted from Dashing Dish
Printer-friendly copy
Ingredients:
3 hard-cooked eggs (3 egg whites and 1 yolk, discard the other 2 yolks)
1/2 stalk celery, diced
1 mini dill pickle, chopped
1/4 cup Miracle Whip Light dressing
1/2 tsp. mustard
1 tsp. Penzey's Sunny Paris seasoning
Sprinkle of dried dill
Salt and ground pepper, to taste
Directions:
Coarsely chop three egg whites and one egg yolk and place them in a medium-sized bowl along with the celery and pickle. Set aside. In a small bowl, mix the light dressing, mustard, and seasonings. Pour the dressing mixture over the eggs and gently stir until completely mixed. Serve immediately by itself or on a flatbread. Refrigerate any leftovers.
Calories: Approximately 185 (entire recipe)
Serves: 2
Monday, May 19, 2014
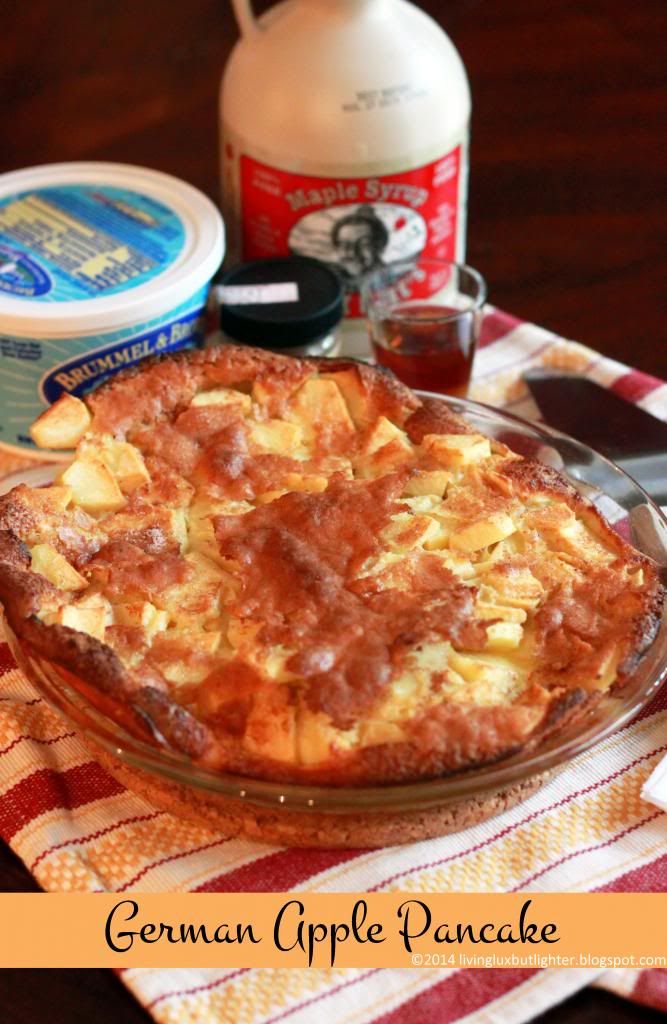
German Apple Pancake
Sometimes we have breakfast for dinner. Because it's easy. And fairly low in calories, considering the protein content. And since we don't necessarily care for a large meal as we start our day, it's also the only way we ever get to enjoy something like this: a German apple pancake. Apparently, these are also known as Dutch Baby Pancakes or Bismarcks or Danish Pancakes or a host of other names, but since I'm ethnically half German, we'll call it a German Apple Pancake. Whatever it's called, it's nice to pull it out of the oven and be able to eat it as a family while it's actually hot (tell me you know about how you can't do that with regular pancakes...the cook always ends up eating them cold...or - blah - reheated). This is one of hubby's faves and he never turns it down when I suggest it as a low(er) calorie dinner.
German Apple Pancake
Adapted from Penzeys
Printer-friendly copy
German Apple Pancake
Adapted from Penzeys
Printer-friendly copy
Ingredients:
2 large eggs
⅓ cup all-purpose flour
¼ tsp. salt
6 Tbsp. skim milk
1 tsp. vanilla extract
2 Tbsp. granulated sugar
¼ tsp. Penzeys Apple Pie spice (cinnamon may be used as a substitute)
2 Tbsp. Land O Lakes Light Butter
1 medium apple, cored, peeled and thinly sliced
Directions:
Preheat oven to 400 degrees. Place an empty 8” or 9” glass pie pan in the oven to heat. Put the eggs, flour, salt, milk, and vanilla extract in a medium bowl and beat on medium speed for 1 minute. In a small bowl, combine the sugar and apple pie spice and set aside. Take the hot pie plate out of the oven and add the butter, moving it around to melt and coat the bottom and sides of the pan. Spread the apple slices in the bottom of the pan and then pour the batter over the top of the apples. Sprinkle the cinnamon sugar over the top. Bake for 20-25 minutes until puffy and golden brown. Serve immediately drizzled with maple syrup.
Serves:
2 (two slices each or half a pancake), approximately 298 calories per serving
Thursday, May 8, 2014
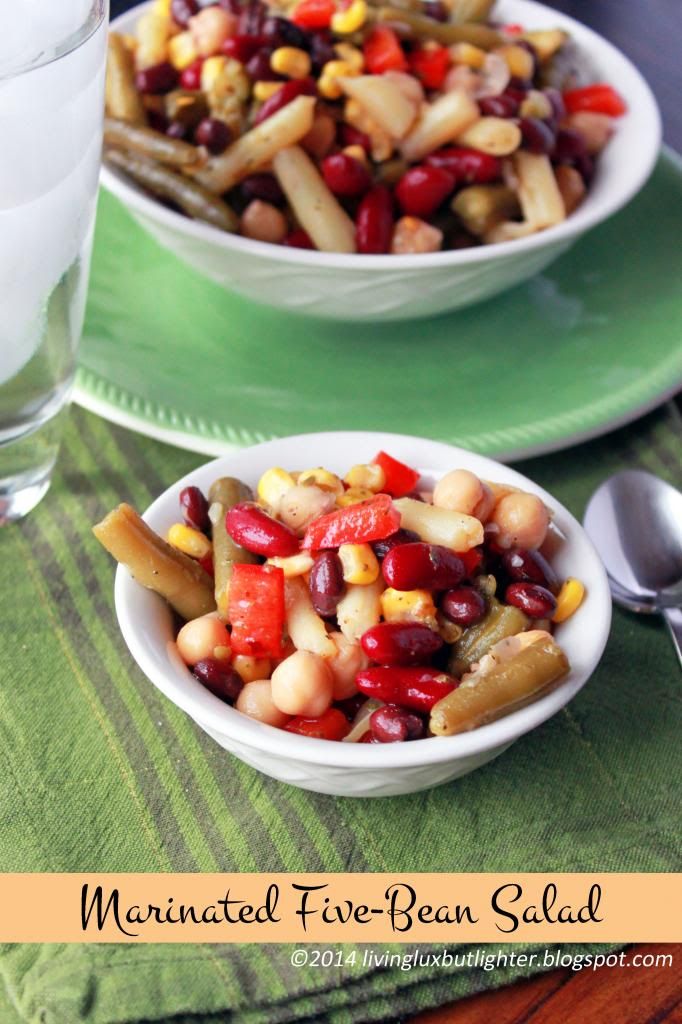
Marinated Five-Bean Salad (gluten-free, vegan)
It's finally warming up in our neck of the woods. Finally (it's ONLY May!). At last it's time to put away the soup pot, fire up the grill and break out the salads. My go-to salad is this one. But, in all honesty, it takes a lot of time to cut up all the veggies. I needed something in my repertoire that was quick and easy. And I like a side dish that is either a) low in calories or b) packs a nutritious punch. And, of course, yummy (that's such a given, I almost neglected to mention it!) This salad is all of the above: fast, skinny, and filled with protein. And as a bonus for my friends with food allergies and sensitivities, it's both gluten-free AND vegan, so it will be perfect to share at this summer's backyard barbecues. Hubby declared it a keeper!
Marinated 5-Bean Salad
Adapted from CalorieKing.com
Printer-friendly copy
Serves: 8 generous servings, approximately 146 calories each
Marinated 5-Bean Salad
Adapted from CalorieKing.com
Printer-friendly copy
Ingredients:
½ c. red wine vinegar
3 Tbsp. Splenda
2 Tbsp. extra-virgin olive oil
1 ½ tsp. Italian seasoning
½ tsp. minced garlic
½ tsp. salt
¼ tsp. black pepper
¼ tsp. red pepper flakes (optional)
1 c. frozen corn
1 red bell pepper, diced
1 can (14.5 oz.) wax beans, drained
1 can (14.5 oz.) cut green beans, drained
1 can (16 oz.) kidney beans, drained and rinsed
1 can (15 oz.) garbanzo beans, drained and rinsed
1 can (15.5 oz.) black beans, drained and rinsed.
Directions:
Combine vinegar, Splenda, olive oil, and spices in a small bowl. Whisk to combine, then set aside. In a large bowl, combine corn, red bell pepper, and all varieties of beans. Toss, then pour dressing over the top and gently stir to ensure all the beans are covered. Cover and refrigerate several hours or overnight, stirring occasionally and prior to serving.
Serves: 8 generous servings, approximately 146 calories each
Thursday, April 24, 2014
Cadbury White Blondies with Peanut Butter Chips
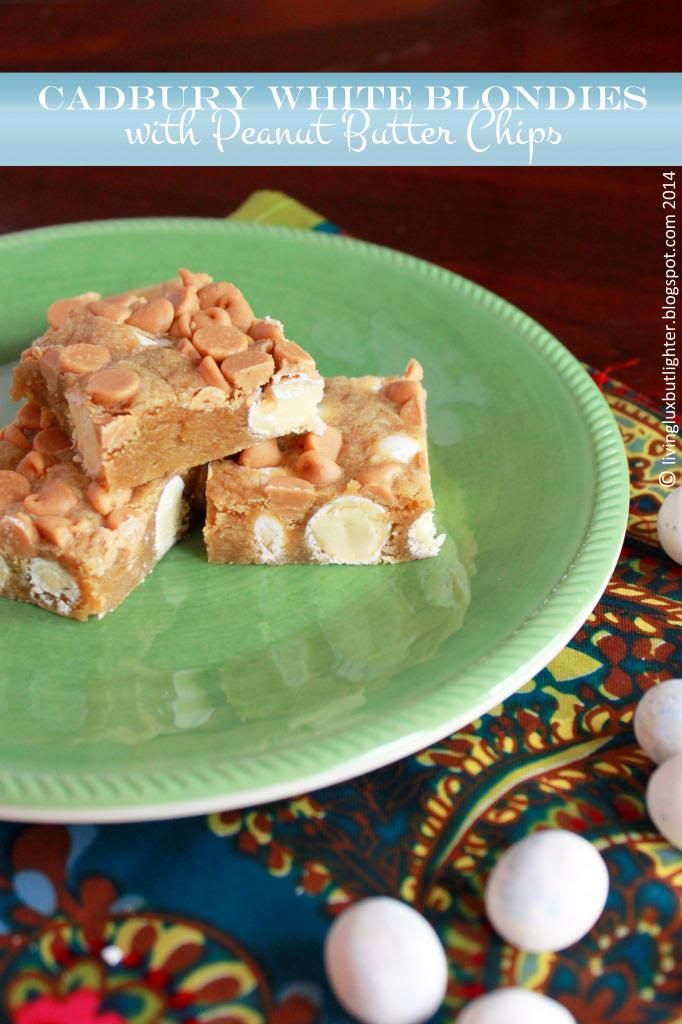
Of all the holidays, Easter has the best candy. Reese's Pieces Eggs. Nerds Bumpy Jelly Beans. Cadbury Mini Eggs. Yes, please! The pinnacle of Easter candy yumminess, though, has got to be the Cadbury WHITE Mini Eggs, which were available exclusively at Target for 2014 (I'm still unclear as to why the plethora of candy exclusivity, but that is a matter for another day). I found myself buying a bag here and a bag there, stashing them away, only to sneak an egg here, and another egg there (that might explain the five pounds I gained during Easter...and also that candy is not something I give up for Lent). Needless to say, the White Mini Eggs need to go (and go quickly!) or this egg sneaking thing could last all spring. And so I made these:
Cadbury White Blondies with Peanut Butter Chips
Adapted from Averie Cooks
Printer-friendly copy
Ingredients:
1 stick butter, melted
1 large egg
1 cup light brown sugar, packed
1 tablespoon vanilla extract
1 cup all-purpose flour
1 cup Cadbury White Mini Eggs
½ cup peanut butter chips
Directions:
Preheat oven to 350 degrees. Line an 8x8 baking pan with aluminum foil, spray with cooking spray and set aside. Melt the butter in a microwave-safe bowl or measuring glass. Place the egg, brown sugar, and vanilla in a large mixing bowl, add in the melted butter, and whisk until smooth. Add the flour and stir until combined. Mix in the Cadbury White Mini Eggs. Transfer the batter to the baking pan and smooth the top with a spatula. Sprinkle the peanut butter chips evenly over the top of the batter and press them down lightly to set. Bake for 23-25 minutes. Allow bars to cool completely before slicing.
Serves: 16 bars, 213 calories each
Cadbury White Blondies with Peanut Butter Chips
Adapted from Averie Cooks
Printer-friendly copy
Ingredients:
1 stick butter, melted
1 large egg
1 cup light brown sugar, packed
1 tablespoon vanilla extract
1 cup all-purpose flour
1 cup Cadbury White Mini Eggs
½ cup peanut butter chips
Directions:
Preheat oven to 350 degrees. Line an 8x8 baking pan with aluminum foil, spray with cooking spray and set aside. Melt the butter in a microwave-safe bowl or measuring glass. Place the egg, brown sugar, and vanilla in a large mixing bowl, add in the melted butter, and whisk until smooth. Add the flour and stir until combined. Mix in the Cadbury White Mini Eggs. Transfer the batter to the baking pan and smooth the top with a spatula. Sprinkle the peanut butter chips evenly over the top of the batter and press them down lightly to set. Bake for 23-25 minutes. Allow bars to cool completely before slicing.
Serves: 16 bars, 213 calories each
Sunday, March 30, 2014
Gooey Butter Cake Cookies
Gooey butter cake cookies. Kind of a funny name, but actually a very fitting and accurate description. And they're totally simple to boot! What could be better?
I first tasted these cookies at a luncheon. They were some of the most decadent cookies I'd ever eaten. Expecting something lemony and perhaps crunchy, they were soft and extremely buttery. I knew the cookies had been purchased at Schnucks, so when I had the chance, I checked out the market's website to find out what they were called: Gooey Butter Cookies.
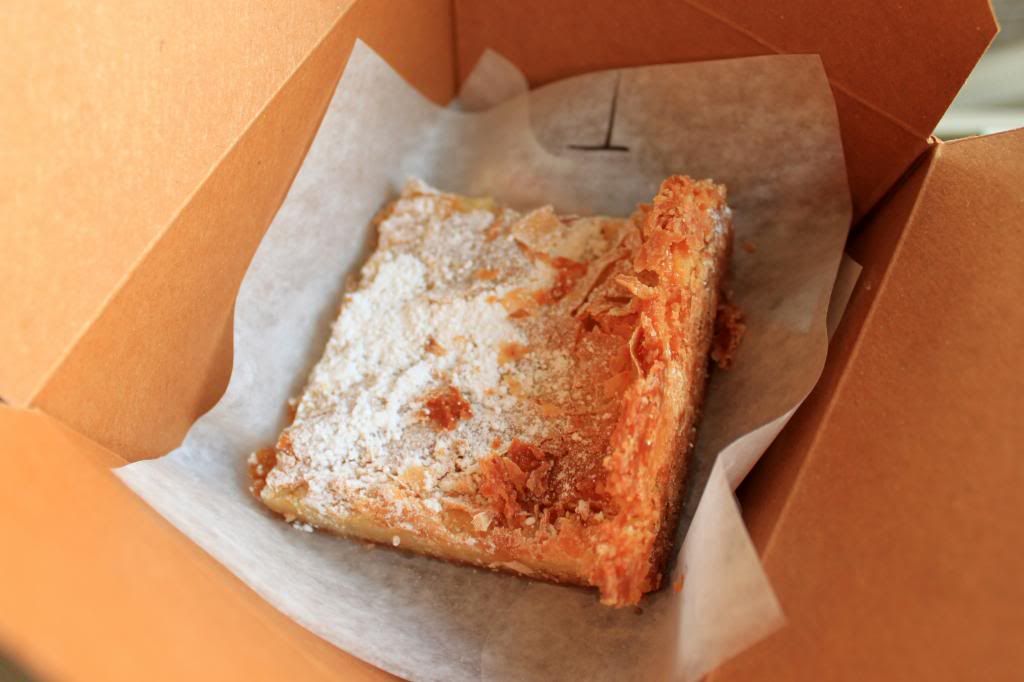
Once I had the name of the cookies, I learned that gooey butter CAKE is actually a St. Louis tradition. It was supposedly made by accident in the 1930s when a local baker making cake batter swapped the proportions of butter and flour. The bakery served the flat, dense cake anyway and it became popular. A number of bakeries in St. Louis now make the treat. When we visited St. Louis last summer, we made sure to find some at Park Avenue Coffee. It was very good and extremely butter (although flatter than I anticipated), but I decided I actually prefer these cookies instead!
(Traditional Gooey Butter Cake from Park Avenue Coffee in St. Louis)
Gooey Butter Cake Cookies
Adapted slightly from Allrecipes.com
Printer-friendly copy
Ingredients:
1 - 8 oz. package cream cheese
½ cup (1 stick) butter, softened
1 egg
¼ teaspoon vanilla extract
1 18.25 oz. box yellow cake mix
⅓ cup powdered sugar
Directions:
Preheat oven to 350 degrees. In a medium bowl, cream together the cream cheese and butter. Mix in the egg and vanilla until well blended. Add the cake mix and mix until combined. Using a medium-size cookie scoop, roll the dough into balls. Coat the dough balls in powdered sugar. Place the dough balls on an ungreased cookie sheet, one inch apart. Bake for 10-13 minutes. Remove from baking sheets to cool on wire racks. Store in a covered container. Makes approximately 28-29 cookies.
Calories: Approximately 115/cookie
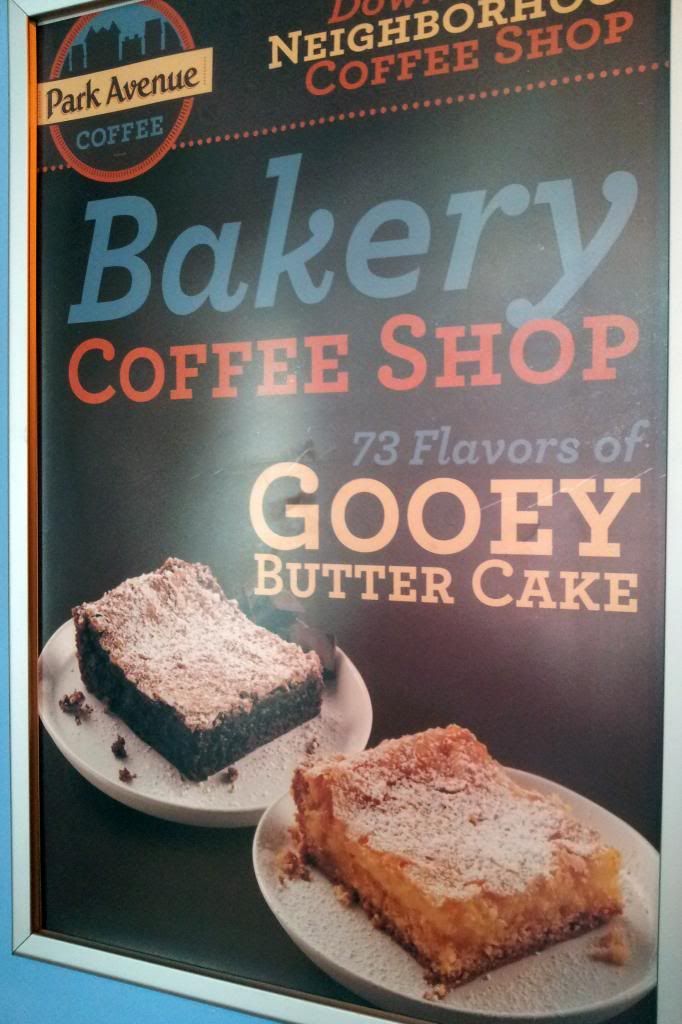
Park Avenue Coffee makes Gooey Butter Cake in 73 different flavors. This means one could easily swap out the yellow cake mix for pretty much any other flavor of cake mix. The possibilities are only limited by cake mix varieties! Enjoy!
Tuesday, March 4, 2014
Nutella Rugelach
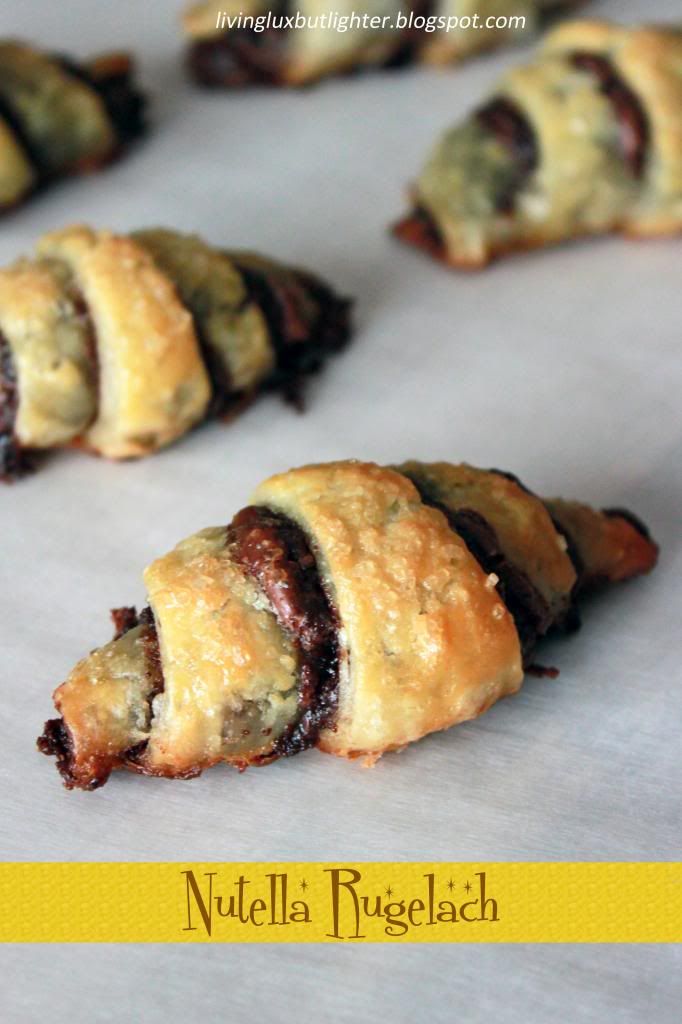
My boy E loves his Nutella. L-o-v-e-s. So when I saw this recipe on my Pinterest feed, I knew it would be right up his alley. But the thing is, my boy is also picky. So I sort of have to run recipe ideas by him first, so I don't spend a bunch of time making something he'll take one look at and decide not to try. So I showed it to him. And his interest was piqued. And I hoped I might have a winner.
When the opportunity arose, I made the pastry dough. Unlike any pie dough I've ever worked with, this was a dream. It came together really easy, but wasn't sticky. And it rolled out into a perfect circle. I've never had that happen before! The most difficult part of the recipe was spreading the Nutella onto the narrow point of each triangular-shaped piece (there are great step-by-step directions here).
Bubba wanted to have a taste as soon as the pastries came out of the oven, but he did take my sage advice to wait until they cooled a bit. He ate one and asked for another (Mom score!). Then I decided I ought to have a taste. The rugelach was still pretty warm (no, I don't always follow my own advice...do you?) but it was also really crispy, like an actual pastry! And that's when I decided to snap a few photos (because this recipe is definitely a keeper) to send to my hubby. He's a Nutella fan, too. Later that evening hubby tried one and after that complained how much willpower it was taking not to eat another. He gave in, though. And so did I. Again. They're really that good.
Nutella Rugelach
Adapted from The Dough Will Rise Again
Printer-friendly copy
Makes 16 pastries
Ingredients:
1 1/4 c. all-purpose flour
1/4 tsp. salt
1 1/2 Tbsp. (4 1/2 tsp.) granulated sugar
1 stick (8 Tbsp.) salted butter, cold, cut into 1/2" cubes
1/4 c. Greek yogurt, plain or vanilla (I used non-fat)
1 1/2 tsp. vanilla extract
1/4 c. ice water
10 Tbsp. Nutella (warmed slightly, if necessary, to ease spreading)
1 egg + 1 Tbsp. water, beaten well
Raw or turbinado sugar, for sprinkling
Directions:
In a food processor, add the flour, salt, sugar, and butter cubes. Pulse until the butter is just cut into the flour, and there are pea-size pieces of butter (about 4-5 pulses). In a small bowl, whisk together the Greek yogurt, vanilla extract, and water. Add a third of the yogurt mixture to the food processor, then pulse three or four time. Repeat two more times until all the yogurt mixture has been added, and the dough has just come together (you want to keep the pulsing to a minimum, so as not to overwork the dough). Turn the dough out onto a lightly floured surface and lightly pat it so that it sticks together. Wrap in plastic wrap coated with non-stick spray and place in the fridge to chill for one hour. When the dough has chilled, lightly flour your work surface and roll the dough out to about a 1/8″ thickness. As you roll, be sure to lift and rotate the dough often, so the dough doesn't stick to the work surface. Once the dough is rolled out, cut it into a rough circle shape by trimming the jagged edges. Remove the scrap edges, and then cut the circle into 16 wedges. Using a butter knife or small spatula, spread Nutella onto each wedge; you want to cover it as well as you can from top to bottom, leaving a thin but substantial layer of filling. Then, roll each triangle up, starting with the widest end and rolling toward the point, and place them on a parchment-lined baking sheet (with the tip of the triangle tucked underneath the roll, so they don’t start to unravel). Chill the rolls in the fridge for about an hour. Preheat oven to 400 degrees. Remove the pastries from the refrigerator, brush with egg wash, and sprinkle with sugar, if desired. Bake for 15-18 minutes, until golden brown. Allow to cool (if you can!) and enjoy. Store in a covered container.

When the opportunity arose, I made the pastry dough. Unlike any pie dough I've ever worked with, this was a dream. It came together really easy, but wasn't sticky. And it rolled out into a perfect circle. I've never had that happen before! The most difficult part of the recipe was spreading the Nutella onto the narrow point of each triangular-shaped piece (there are great step-by-step directions here).
Bubba wanted to have a taste as soon as the pastries came out of the oven, but he did take my sage advice to wait until they cooled a bit. He ate one and asked for another (Mom score!). Then I decided I ought to have a taste. The rugelach was still pretty warm (no, I don't always follow my own advice...do you?) but it was also really crispy, like an actual pastry! And that's when I decided to snap a few photos (because this recipe is definitely a keeper) to send to my hubby. He's a Nutella fan, too. Later that evening hubby tried one and after that complained how much willpower it was taking not to eat another. He gave in, though. And so did I. Again. They're really that good.
Nutella Rugelach
Adapted from The Dough Will Rise Again
Printer-friendly copy
Makes 16 pastries
Ingredients:
1 1/4 c. all-purpose flour
1/4 tsp. salt
1 1/2 Tbsp. (4 1/2 tsp.) granulated sugar
1 stick (8 Tbsp.) salted butter, cold, cut into 1/2" cubes
1/4 c. Greek yogurt, plain or vanilla (I used non-fat)
1 1/2 tsp. vanilla extract
1/4 c. ice water
10 Tbsp. Nutella (warmed slightly, if necessary, to ease spreading)
1 egg + 1 Tbsp. water, beaten well
Raw or turbinado sugar, for sprinkling
Directions:
In a food processor, add the flour, salt, sugar, and butter cubes. Pulse until the butter is just cut into the flour, and there are pea-size pieces of butter (about 4-5 pulses). In a small bowl, whisk together the Greek yogurt, vanilla extract, and water. Add a third of the yogurt mixture to the food processor, then pulse three or four time. Repeat two more times until all the yogurt mixture has been added, and the dough has just come together (you want to keep the pulsing to a minimum, so as not to overwork the dough). Turn the dough out onto a lightly floured surface and lightly pat it so that it sticks together. Wrap in plastic wrap coated with non-stick spray and place in the fridge to chill for one hour. When the dough has chilled, lightly flour your work surface and roll the dough out to about a 1/8″ thickness. As you roll, be sure to lift and rotate the dough often, so the dough doesn't stick to the work surface. Once the dough is rolled out, cut it into a rough circle shape by trimming the jagged edges. Remove the scrap edges, and then cut the circle into 16 wedges. Using a butter knife or small spatula, spread Nutella onto each wedge; you want to cover it as well as you can from top to bottom, leaving a thin but substantial layer of filling. Then, roll each triangle up, starting with the widest end and rolling toward the point, and place them on a parchment-lined baking sheet (with the tip of the triangle tucked underneath the roll, so they don’t start to unravel). Chill the rolls in the fridge for about an hour. Preheat oven to 400 degrees. Remove the pastries from the refrigerator, brush with egg wash, and sprinkle with sugar, if desired. Bake for 15-18 minutes, until golden brown. Allow to cool (if you can!) and enjoy. Store in a covered container.
Thursday, February 20, 2014
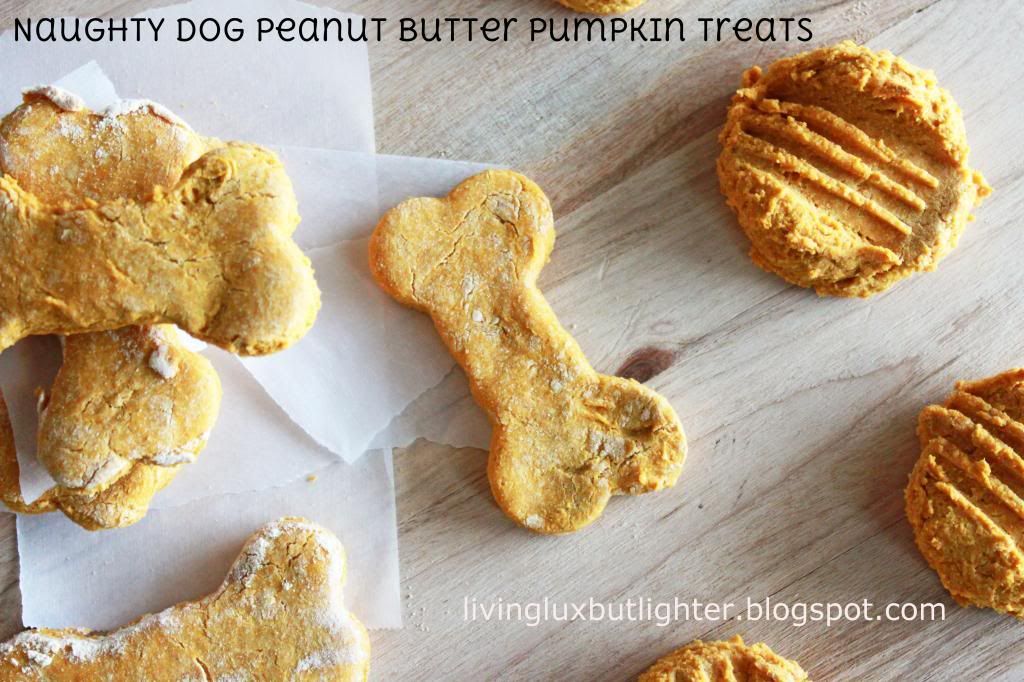
Naughty Dog Peanut Butter Pumpkin Treats (Grain Free)
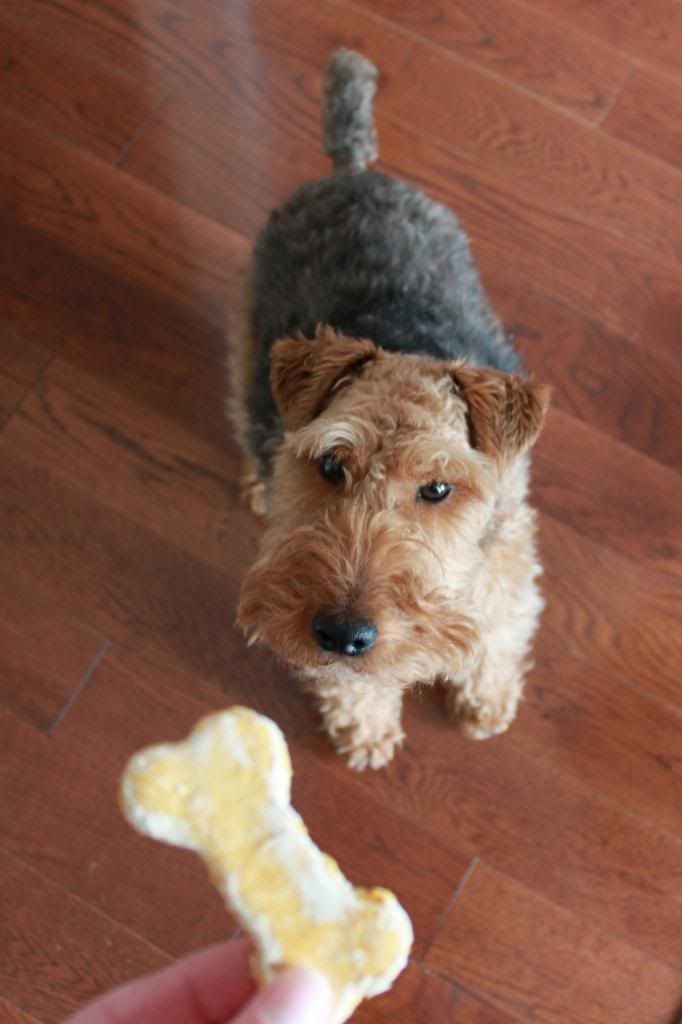
I made Ruby some dog treats today.
After she ate Bubba's crayons.
Egad. Nice.
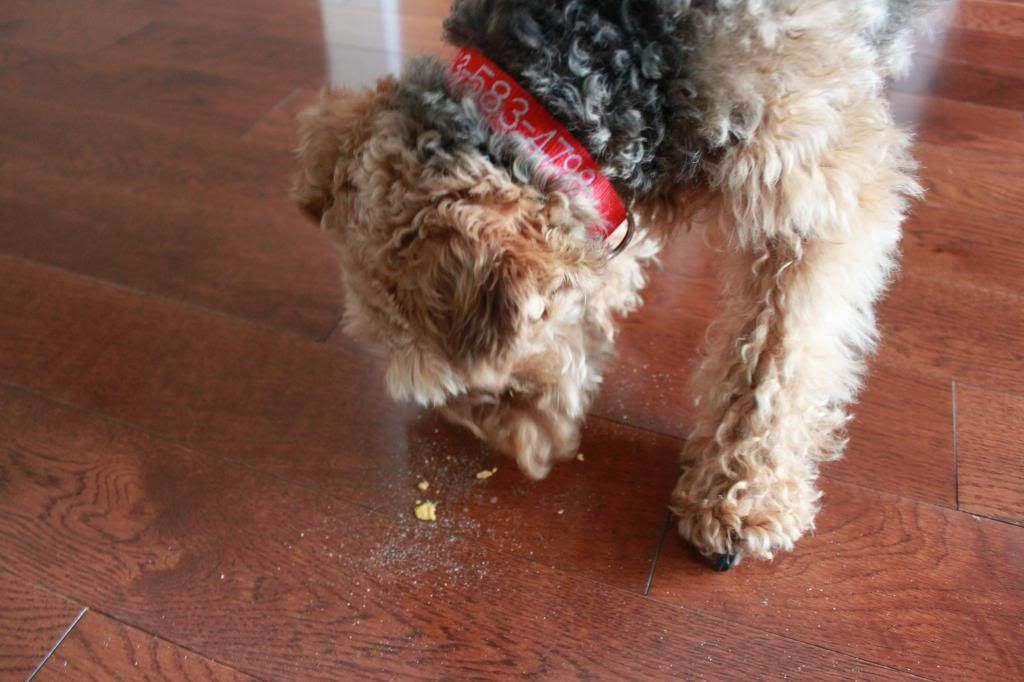
The whole reason I wanted to make Ruby some treats in the first place is because she's sort of been through a lot in the past month. She had major surgery (which I shall refrain from describing on this, a food/family blog) and unexpectedly spent about three weeks at the puppy hospital recuperating. We're really happy she's well enough to be home. Not so happy about the crayon eating, but I digress. Plus, she's almost out of kennel treats (which she gets when she goes "in in" to her kennel on her own), so the timing was good. Anyhow, I made her some reward biscuits. And she likes them. Quite a lot. She even seemed to know when I was mixing them up that they were for her. She stalks me whenever I'm in the kitchen anyway, because apparently a lot of stuff ends up on the floor. I know, because when she wasn't here, I had to get the vacuum out. A lot. She's a smarty, that one!
Naughty Dog Peanut Butter Pumpkin Treats (Grain Free)
from A Cozy Kitchen
Printer-friendly copy
2 1/2 cups garbanzo-fava flour (plus additional, as needed)
2 eggs
3/4 cup canned pumpkin
2 1/2 tablespoons peanut butter
Preheat oven to 300 degrees. In a large bowl, mix together flour, eggs, pumpkin, and peanut butter. Turn out dough onto a floured surface (it is sticky, so use additional flour as necessary). With a rolling pin, roll the dough to a thickness about 1/4-inch to 1/2-inch thick. Using a cookie cutter of your choosing, cut the dough into shapes and transfer onto a Silpat-lined baking sheet. Alternatively, use a medium-size cookie scoop to shape the dough and flatten slightly with a fork. Bake for 30-40 minutes and allow to cool completely before serving to your pooch. Store in a sealed container.
After she ate Bubba's crayons.
Egad. Nice.
The dog treats weren't a reward. Certainly not. But I already had the ingredients, E had the day off school due to snow (or no snow, as the case may be), and I wasn't going anywhere because I'm sick. Hacking up a lung, in fact. And I felt like baking something, and no human in their right mind is going to eat baked goods made by a coughing sick person (i.e., me). Sooo, dog treats for a naughty dog. Right-o.
Naughty Dog Peanut Butter Pumpkin Treats (Grain Free)
from A Cozy Kitchen
Printer-friendly copy
2 1/2 cups garbanzo-fava flour (plus additional, as needed)
2 eggs
3/4 cup canned pumpkin
2 1/2 tablespoons peanut butter
Preheat oven to 300 degrees. In a large bowl, mix together flour, eggs, pumpkin, and peanut butter. Turn out dough onto a floured surface (it is sticky, so use additional flour as necessary). With a rolling pin, roll the dough to a thickness about 1/4-inch to 1/2-inch thick. Using a cookie cutter of your choosing, cut the dough into shapes and transfer onto a Silpat-lined baking sheet. Alternatively, use a medium-size cookie scoop to shape the dough and flatten slightly with a fork. Bake for 30-40 minutes and allow to cool completely before serving to your pooch. Store in a sealed container.
Wednesday, February 5, 2014
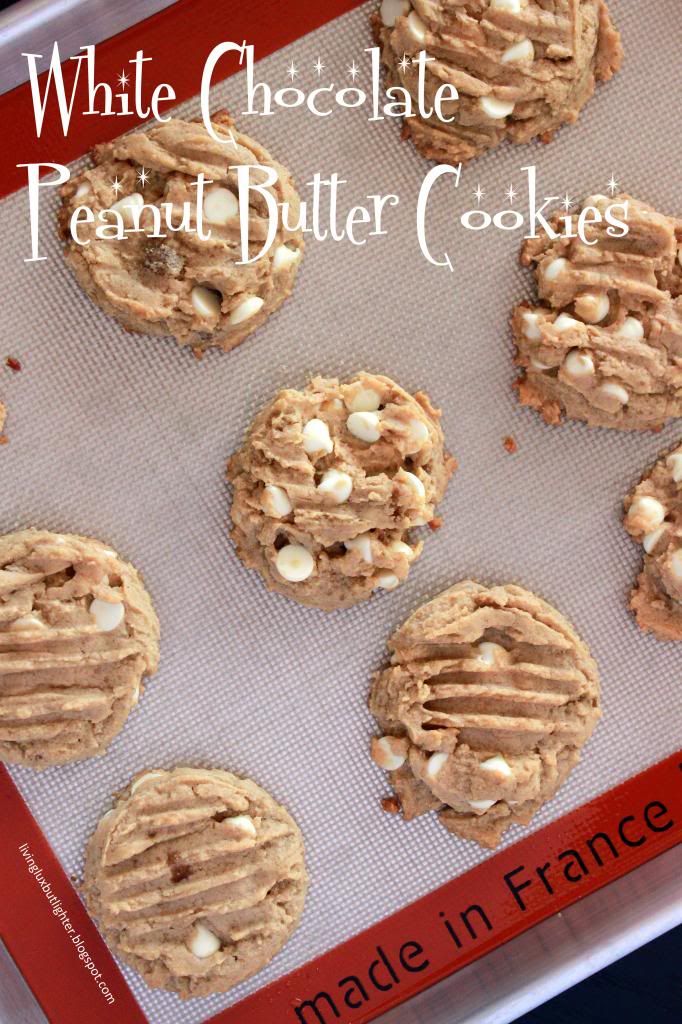
White Chocolate Peanut Butter Chip Cookies
Peanut butter and white chocolate are two things I just cannot seem to get enough of. I've been wanting to make these cookies for some time, but I didn't want a whole batch of them sitting on the countertop calling my name. Because I'd answer. So when the opportunity arose to take some cookies to someone who is doing us a ginormous favor, I totally jumped on it with these. I hope our favorer likes them. I certainly do! If you make them, let me know what you think!
White Chocolate Peanut Butter Cookies
Adapted from Jif
Ingredients:
¾ cup creamy peanut butter
½ cup butter flavor vegetable shortening
1¼ cups light brown sugar, packed
3 tablespoons milk
1 tablespoon vanilla extract
1 large egg
1 cup all-purpose flour
¾ cup bread flour
¾ teaspoon baking soda
¾ teaspoon salt
1 12-ounce bag white baking chips, or 12 ounces white chocolate, chopped
Directions:
Preheat oven to 375 degrees. In a large bowl, combine peanut butter, shortening, brown sugar, milk, and vanilla. With a hand or stand mixer, cream together on medium speed until very well blended, scraping down the sides of the bowl as necessary. Add egg and beat briefly, just until blended. Add flours, baking soda and salt and mix to combine at low speed; do not overmix. Add in the baking chips or white chocolate, again just until blended. Using a medium cookie scoop, place batter on baking sheets lined with a Silpat mat or parchment paper two inches apart. Flatten slightly with the tines of a fork. Bake 7 to 8 minutes or until set and just beginning to brown. Cool on baking sheet for 2 minutes before transferring to a wire rack to cool completely. Store in a sealed container.
Thursday, January 16, 2014
Quotes Worth Remembering
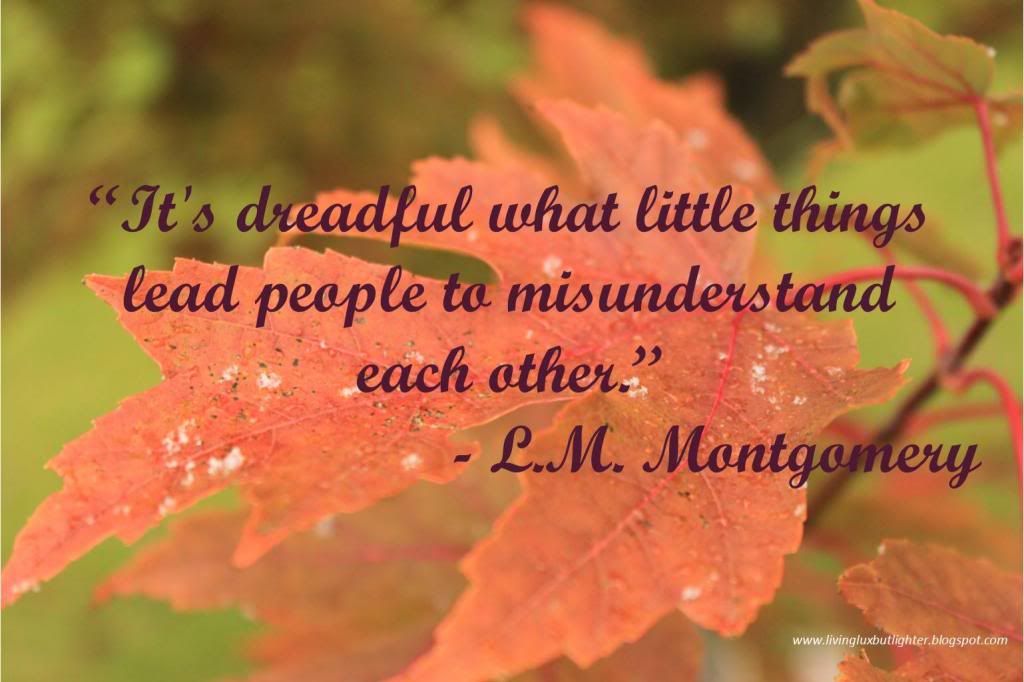
A couple of the bloggers I follow regularly on Pinterest often pin inspirational or memorable sayings and quotes. My mom always used to tell me, "Tomorrow is a new day," so I went on a Google search to see if that was actually a quote. Turns out, it's from L.M. Montgomery, author of Anne of Green Gables. How perfect is that?
Using one of my Photo A Day reject photos, I created my own inspirational quote photo. I kind of like it and thought it would be fun to share:
I made another in October that I posted on my Facebook page. Curiously enough, it's also an L.M. Montgomery quote:
There are lots of Bible verses that would be great in this format, too. Good thing I have a lot of reject photos!
What are your favorite quotes and Bible verses?
Using one of my Photo A Day reject photos, I created my own inspirational quote photo. I kind of like it and thought it would be fun to share:
I made another in October that I posted on my Facebook page. Curiously enough, it's also an L.M. Montgomery quote:
There are lots of Bible verses that would be great in this format, too. Good thing I have a lot of reject photos!
What are your favorite quotes and Bible verses?
Friday, December 20, 2013
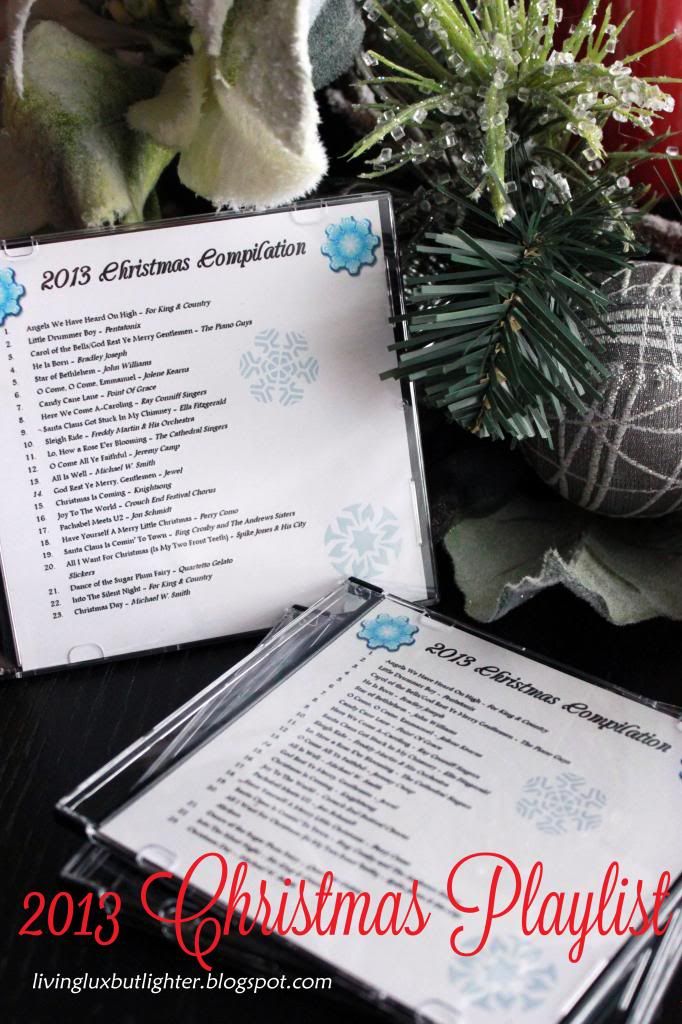
2013 Christmas Playlist
Last year, I shared with you one of my favorite (and longest running) holiday traditions - an annual music CD. With the advent of iPods and music-playing phones, it has morphed into more of a playlist, but it's still just as fun. It's also interesting to see how my musical tastes have varied over the years. We recently attended A Madison Symphony Christmas and a few of this year's songs were those we heard played at the event. I always try to include new and modern songs along with standard, traditional favorites. It's a nice mix to have playing while you bake cookies or when opening gifts.
And so I give you my 2013 Christmas music playlist:
- Angels We Have Heard On High - For King & Country
- Little Drummer Boy - Pentatonix
- Carol of the Bells/God Rest Ye Merry Gentlemen - The Piano Guys
- He Is Born - Bradley Joseph
- Star of Bethlehem - John Williams (from Home Alone)
- O Come, O Come, Emmanuel - Jolene Kearns
- Candy Cane Lane - Point Of Grace
- Here We Come A-Caroling - Ray Conniff Singers
- Santa Claus Got Stuck In My Chimney - Ella Fitzgerald
- Sleigh Ride - Freddy Martin & His Orchestra
- Lo, How A Rose E'er Blooming - The Cathedral Singers
- O Come All Ye Faithful - Jeremy Camp
- All Is Well - Michael W. Smith
- God Rest Ye Merry Gentlemen - Jewel
- Christmas Is Coming - Knightsong
- Joy To The World - Crouch End Festival Chorus
- Pachabel Meets U2 - Jon Schmidt
- Have Yourself A Merry Little Christmas - Perry Como with The Ray Charles Singers
- Santa Claus Is Comin' To Town - Bing Crosby & The Andrews Sisters
- All I Want For Christmas (Is My Two Front Teeth) - Spike Jones & His City Slickers
- Dance of the Sugar Plum Fairy (from The Nutcracker) - Quartetto Gelato
- Into The Silent Night - For King & Country
- Christmas Day - Michael W. Smith
Monday, November 4, 2013
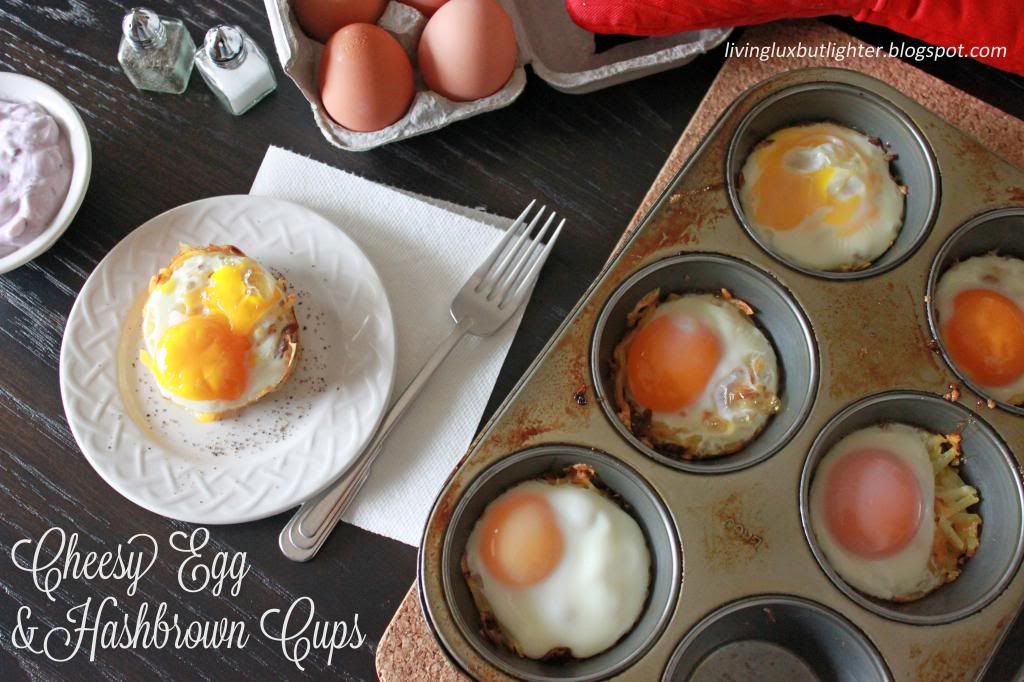
Cheesy Egg and Hashbrown Cups
If you know me at all, you know I have a sweet tooth. Like, bad. Ice cream, cookies, cupcakes, chocolate. I'm up for it all! And because of that, I have to watch what I eat for meals and really contain my calories.
That's where these babies come in. Cheesy Egg and Hashbrown Cups. At around 150 calories each, they're great for my "short workout" (i.e., 30 minutes) days, when I don't earn a lot of extra calories. Paired with a Greek yogurt, they have lots of protein to keep me going until my next meal. I bake up a batch and can reheat and eat them all week long.
On another note, I usually try to buy a dozen farm-fresh eggs from a friend, but in a pinch, I'll get cage-free eggs from the store. I ran out midway through this batch of cups, so some are farm-fresh and some are store bought. Check out the color difference...it's quite noticable!
Cheesy Egg and Hashbrown Cups
Adapted from http://simplegirlathome.blogspot.com
Printer-friendly copy
Serves 6
Ingredients:
1/2 lb. (8 oz.) frozen hash browns
2 Tbsp. light butter, melted
1/2 c. 2% colby jack or cheddar cheese, shredded
1 tsp. Penzey's 4S seasoned salt
6 Tbsp. (or 6 slices, cooked) crumbled bacon
6 large cage-free eggs
Instructions:
Preheat oven to 425 degrees. Spray jumbo muffin tin (with 6 cups) generously with cooking spray. In a large bowl, combine hash browns, melted light butter, cheese, seasoned salt, and bacon. Stir with a silicone spatula until mixed well. Divide mixture evenly among the 6 cups of the muffin tin. Bake for 15-20 minutes until crispy and golden brown. Remove from oven. Crack one egg into each muffin tin. Return to oven and bake for an additional 10-15 minutes, depending upon how solid you like your egg yolks. Remove from muffin tins and season with salt and pepper, as desired. Serve or cover and refrigerate.
Calories: 150 calories (approximately, depending on brands and/or specific varieties of ingredients)
Thursday, October 3, 2013
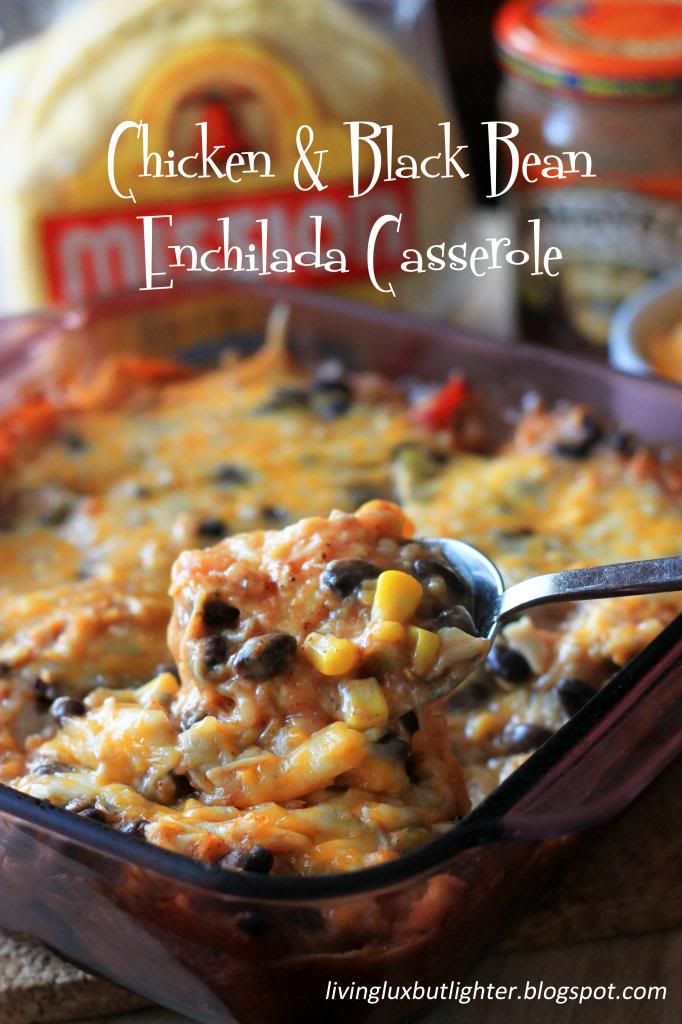
Chicken & Black Bean Enchilada Casserole
A few years ago when the hubs and I decided to drop the pounds we'd packed on, I had to revamp how I cooked. Cutting back to 1200 to 1500 calories a day from the 2500 to 3000 (that realization was shocking!) we had been eating was tough. Hardly ANY of my old recipes fit the bill. One of the resources I turned to for new ideas was Hungry Girl. Her recipes feature easy-to-find ingredients and are almost always super simple to throw together. This is one of the recipes I discovered that we still continue to enjoy, albeit with my revisions. It's spicy, creamy and definitely satisfies a craving for Mexican comfort food!
Chicken and Black Bean Enchilada Casserole
Adapted from Hungry Girl
Printer-friendly copy
Ingredients:
1 - 9.75 oz. can 98% fat-free chunk white chicken breast in water, drained and flaked
1 - 10.75 oz. can 98% fat-free cream of celery condensed soup
1 - 15 oz. can reduced sodium black beans, rinsed and drained
2/3 cup frozen corn
1/2 cup salsa
1 tsp. Penzey's Arizona Dreaming seasoning blend*
1/2 tsp. Penzey's Adobo seasoning*
6 6-inch corn tortillas
1 cup 2% colby-jack cheese, shredded
Instructions:
Preheat oven to 350 degrees. In a large bowl, combine chicken, soup, black beans, corn, salsa, and seasoning (* may substitute your favorite Mexican-style salt-free seasoning blend). Mix well and set aside. Spray an 8x8 baking dish with non-stick cooking spray. Break the corn tortillas into pieces about the size of a tortilla chip. Lay half the tortilla pieces over the bottom of the baking dish. Evenly layer half of the chicken mixture over the tortilla pieces. Sprinkle with half of the cheese. Lay remaining tortilla pieces over the cheese. Top with the rest of the chicken mixture and the remaining cheese. Bake for 35 minutes or until crisp and bubbly. Remove from the oven and cool for 5 minutes to allow the sauce to thicken.
Serves: 4
Calories: 353
Chicken and Black Bean Enchilada Casserole
Adapted from Hungry Girl
Printer-friendly copy
Ingredients:
1 - 9.75 oz. can 98% fat-free chunk white chicken breast in water, drained and flaked
1 - 10.75 oz. can 98% fat-free cream of celery condensed soup
1 - 15 oz. can reduced sodium black beans, rinsed and drained
2/3 cup frozen corn
1/2 cup salsa
1 tsp. Penzey's Arizona Dreaming seasoning blend*
1/2 tsp. Penzey's Adobo seasoning*
6 6-inch corn tortillas
1 cup 2% colby-jack cheese, shredded
Instructions:
Preheat oven to 350 degrees. In a large bowl, combine chicken, soup, black beans, corn, salsa, and seasoning (* may substitute your favorite Mexican-style salt-free seasoning blend). Mix well and set aside. Spray an 8x8 baking dish with non-stick cooking spray. Break the corn tortillas into pieces about the size of a tortilla chip. Lay half the tortilla pieces over the bottom of the baking dish. Evenly layer half of the chicken mixture over the tortilla pieces. Sprinkle with half of the cheese. Lay remaining tortilla pieces over the cheese. Top with the rest of the chicken mixture and the remaining cheese. Bake for 35 minutes or until crisp and bubbly. Remove from the oven and cool for 5 minutes to allow the sauce to thicken.
Serves: 4
Calories: 353
Tuesday, September 10, 2013
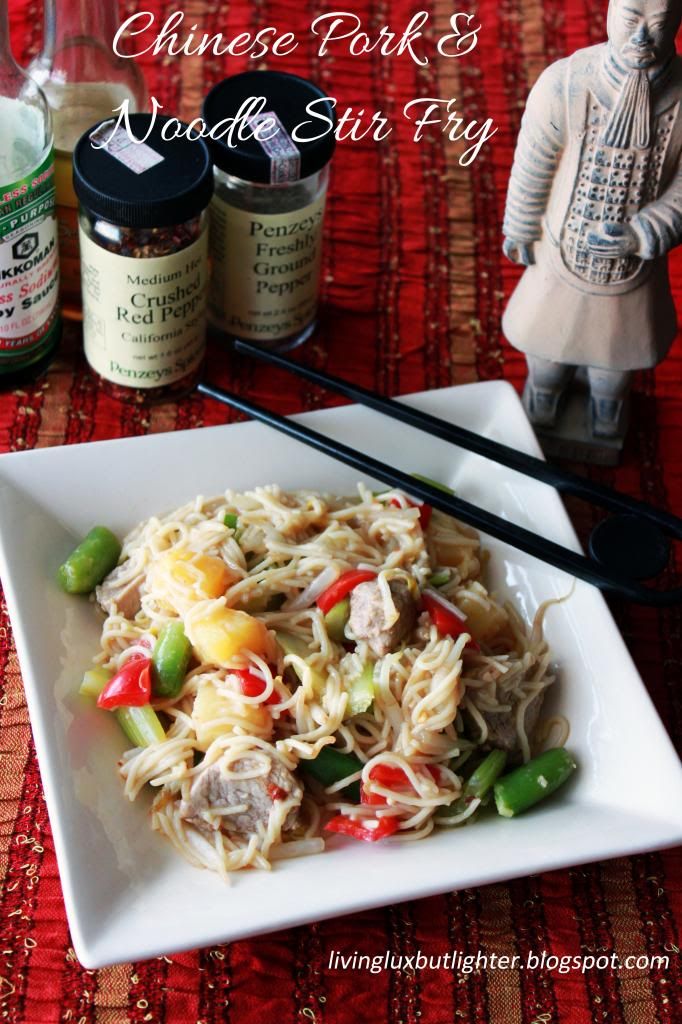
Chinese Pork and Noodle Stir Fry
I had a revelation last week. I realized that, although the name of my blog is "Living Lux But Lighter," most of my recipes are...well...not so light. More like indulgent! So rather than change my blog name, I thought it might actually be a good idea to include a few "lighter" recipes. Brilliant, eh? I mean, I don't sit around eating Decadent Caramel Brownies all day! If only.
So, enjoy with me a new recipe we tried just last week. It's adapted from Betty Crocker The 300 Calorie Cook Book, one of the purchases I made a few years ago when hubby and I decided to drop some pounds. We've been gravitating back to lower calorie meals of late, because if one wants to enjoy a salty snack or adult beverage in the evening, one needs to not eat all of one's available calories at dinner!
Chinese Pork and Noodle Stir Fry
Printer-friendly copy here
Ingredients:
1 - 8 oz. can pineapple chunks in juice, drained (juice reserved)
1 Tablespoon soy sauce
1 teaspoon Splenda brown sugar, packed
2 teaspoons minced garlic
1 Tablespoon cornstarch
1/2 lb. pork tenderloin, cut into 1/4 inch slices
4 oz. uncooked Ronzoni Smart Taste spaghetti
2 teaspoons sesame oil
1/4 cup fat-free chicken broth
1 medium bell pepper (any color), chopped
4 stalks celery, chopped
4 oz. fresh sugar snap peas, strings removed, cut in half
8 oz. bag mung bean sprouts
1/4 teaspoon red pepper flakes, optional
1/2 teaspoon ground black pepper
Directions:
In a medium glass bowl, mix reserved pineapple juice, soy sauce, Splenda brown sugar, garlic and cornstarch. Add pork. Cover and marinate in the refrigerator for at least one hour but no longer than four hours. Cook and drain the pasta as directed on package. In a large skillet or wok, heat sesame oil over medium-high heat. Add pork and marinade, stir-fry 2 minutes. Remove pork from skillet and add broth, bell pepper and celery; cook 6 minutes, stirring frequently. Add peas, pineapple, pasta and bean sprouts. Cook 2 minutes, stirring constantly. Return pork to skillet. Cook and stir about 1 minute until sauce is thickened. Garnish with red pepper flakes, if desired, and black pepper. Serve.
Note:
Replace mung bean sprouts, bell pepper, celery, and/or sugar snap peas with any combination of other vegetables, such as bok choy, onion, water chestnuts, broccoli, or baby corn. This will affect calorie count.
Serves: 4
Calories: 265
So, enjoy with me a new recipe we tried just last week. It's adapted from Betty Crocker The 300 Calorie Cook Book, one of the purchases I made a few years ago when hubby and I decided to drop some pounds. We've been gravitating back to lower calorie meals of late, because if one wants to enjoy a salty snack or adult beverage in the evening, one needs to not eat all of one's available calories at dinner!
Chinese Pork and Noodle Stir Fry
Printer-friendly copy here
Ingredients:
1 - 8 oz. can pineapple chunks in juice, drained (juice reserved)
1 Tablespoon soy sauce
1 teaspoon Splenda brown sugar, packed
2 teaspoons minced garlic
1 Tablespoon cornstarch
1/2 lb. pork tenderloin, cut into 1/4 inch slices
4 oz. uncooked Ronzoni Smart Taste spaghetti
2 teaspoons sesame oil
1/4 cup fat-free chicken broth
1 medium bell pepper (any color), chopped
4 stalks celery, chopped
4 oz. fresh sugar snap peas, strings removed, cut in half
8 oz. bag mung bean sprouts
1/4 teaspoon red pepper flakes, optional
1/2 teaspoon ground black pepper
Directions:
In a medium glass bowl, mix reserved pineapple juice, soy sauce, Splenda brown sugar, garlic and cornstarch. Add pork. Cover and marinate in the refrigerator for at least one hour but no longer than four hours. Cook and drain the pasta as directed on package. In a large skillet or wok, heat sesame oil over medium-high heat. Add pork and marinade, stir-fry 2 minutes. Remove pork from skillet and add broth, bell pepper and celery; cook 6 minutes, stirring frequently. Add peas, pineapple, pasta and bean sprouts. Cook 2 minutes, stirring constantly. Return pork to skillet. Cook and stir about 1 minute until sauce is thickened. Garnish with red pepper flakes, if desired, and black pepper. Serve.
Note:
Replace mung bean sprouts, bell pepper, celery, and/or sugar snap peas with any combination of other vegetables, such as bok choy, onion, water chestnuts, broccoli, or baby corn. This will affect calorie count.
Serves: 4
Calories: 265
Tuesday, September 3, 2013
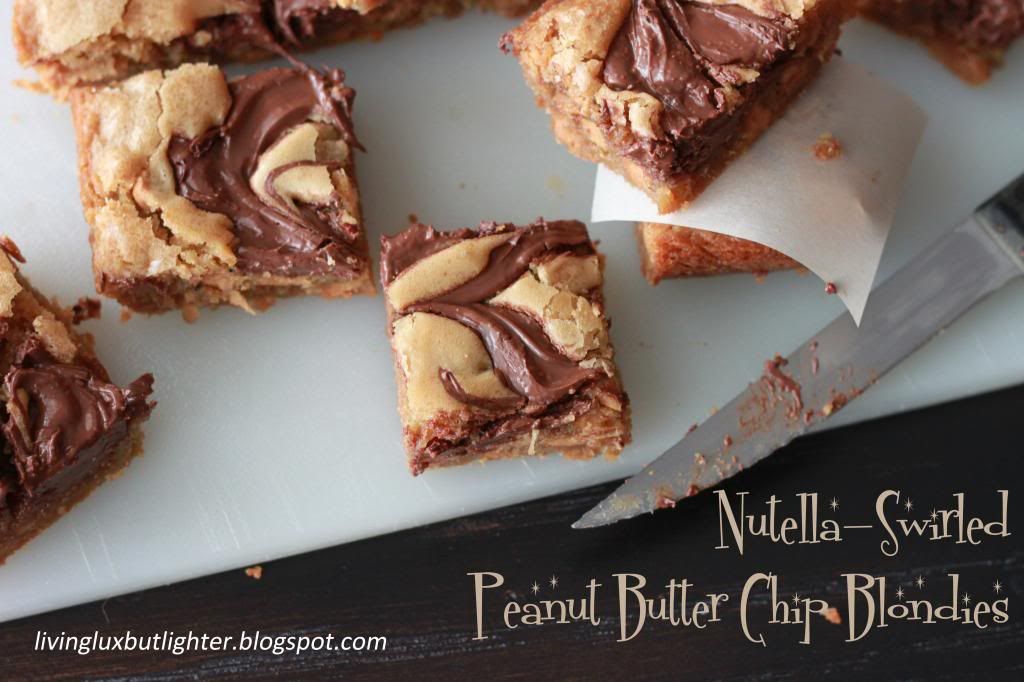
Nutella-Swirled Peanut Butter Chip Blondies
My boy Bubba is a Nutella fiend. He asks me for spoonfuls (sorry, buddy, request denied). All summer I made him Nutella-Stuffed Cinnamon Sugar Muffins for breakfast. Then he wanted to try something different, so recently I've been making him Skinny Double Chocolate Chip Muffins that I "frost" with Nutella. Funny, because I only discovered the stuff in the last couple of years. And now we go through a lot of Nutella. We buy the mega-jar at Sam's Club!
When I saw a recipe for these Nutella-Swirled Peanut Butter Chip Blondies from one of my favorite bloggers, Averie Sunshine, I figured they would be a big hit with my little man. I was right. Since Averie published her recipe in August, I've made three batches!
The original recipe calls for peanut butter chips and Nutella, but I've also tried a semi-sweet chocolate chip/Nutella combination. Surprisingly, Bubba prefers the peanut butter chip version (he's usually ALL ABOUT chocolate). I think these bars would also be tasty with white baking chips and Nutella or white baking chips and peanut butter instead of Nutella. I'll have to bake another batch and test my theory!
For the recipe, visit AverieCooks.com!
When I saw a recipe for these Nutella-Swirled Peanut Butter Chip Blondies from one of my favorite bloggers, Averie Sunshine, I figured they would be a big hit with my little man. I was right. Since Averie published her recipe in August, I've made three batches!
The original recipe calls for peanut butter chips and Nutella, but I've also tried a semi-sweet chocolate chip/Nutella combination. Surprisingly, Bubba prefers the peanut butter chip version (he's usually ALL ABOUT chocolate). I think these bars would also be tasty with white baking chips and Nutella or white baking chips and peanut butter instead of Nutella. I'll have to bake another batch and test my theory!
For the recipe, visit AverieCooks.com!
Wednesday, August 7, 2013
Dark Chocolate Ice Cream with Peanut Butter Ripple
So I haven't blogged for a while. Bad, bad me. I have lots to blog about, I just can't seem to find the time to sit down and do it. But since Bubba has been laid up for a week recouperating from a tonsillectomy and we've been trapped at home, I've been able to catch up on a few projects. A post-Christmas winter wreath that's been sitting on my craft table for MONTHS is almost done, and I finally finished compiling all my photos from the first quarter of 2013 into a Shutterfly album. Now if only I could get caught up on my checkbook...
It hasn't been a horribly hot summer here, but it is generally too warm to want to add extra heat to the house by turning on the oven. So instead of baking, I make ice cream. And the best recipes for ice cream, by far, come from Jeni's Splendid Ice Creams at Home. I've blogged another ice cream recipe from her before. The ice cream turns out so wonderfully creamy and fudgey, almost like frozen brownie dough. It's super fantastic, and since it doesn't contain eggs, there are no worries about salmonella or curdled cream. Try it...I think you'll like it!
Dark Chocolate Ice Cream with Peanut Butter Ripple
Adapted from Jeni Britton Bauer and Averie Sunshine
Printer-friendly copy
Honey Roasted Peanut Butter
8 oz. honey-roasted peanuts
1 1/2 tsp. vanilla
Place honey-roasted peanuts in a food processor. Process until smooth, generally about 5 minutes (read Averie's post here for further information). Once the peanut butter is smooth, add vanilla and continue processing until well-combined. Transfer the peanut butter to a food-safe, covered container and refrigerate for later use.
Dark Chocolate Ice Cream
1 cup whole milk, divided
1 tablespoon plus 1 teaspoon cornstarch
2 ounces semi-sweet or bittersweet chocolate (I used semi-sweet chocolate chips)
1/4 cup heavy cream
1 cup evaporated milk
2/3 cup granulated sugar
2 tablespoons light corn syrup
1/3 cup Hershey's Special Dark cocoa
1/4 teaspoon salt
Mix 2 tablespoons of the milk with the cornstarch in a small bowl to create a slurry and set aside. Place the chocolate chips in a medium bowl and set aside. Fill a third large bowl with ice and water and set aside. Combine the remaining milk, cream, evaporated milk, granulated sugar and corn syrup in a medium-size saucepan and bring to a rolling boil over medium-high heat. Add the cocoa, whisking to incorporate, and boil for 4 minutes. Remove from the heat and whisk in the cornstarch slurry. Bring the mixture back to a boil over medium-high heat and cook, stirring with a spatula, until it is slightly thickened, about 1 minute. Remove from the heat. Gradually pour the hot milk mixture onto the chocolate. Add salt and whisk until the chocolate has melted and the ingredients are well-blended. Pour the liquid into a 1-gallon Ziploc freezer bag and seal. Submerge the bag in the ice bath you created earlier. Let stand about 30 minutes or until cold. Pour the ice cream base into the frozen canister of an ice cream maker and process according to the manufacturer's instructions, about 25 minutes. When the ice cream has finished mixing, remove the peanut butter from the refrigerator and spoon 1-2 tablespoons into the bottom of a 2 quart freezer-safe storage container. Pour some of the ice cream blend on top of the peanut butter. Alternate peanut butter and ice cream until the container is full. Press a sheet of parchment directly against the surface of ice cream and seal with an airtight lid. Freeze until firm, about 4 hours.
It hasn't been a horribly hot summer here, but it is generally too warm to want to add extra heat to the house by turning on the oven. So instead of baking, I make ice cream. And the best recipes for ice cream, by far, come from Jeni's Splendid Ice Creams at Home. I've blogged another ice cream recipe from her before. The ice cream turns out so wonderfully creamy and fudgey, almost like frozen brownie dough. It's super fantastic, and since it doesn't contain eggs, there are no worries about salmonella or curdled cream. Try it...I think you'll like it!
Dark Chocolate Ice Cream with Peanut Butter Ripple
Adapted from Jeni Britton Bauer and Averie Sunshine
Printer-friendly copy
Honey Roasted Peanut Butter
8 oz. honey-roasted peanuts
1 1/2 tsp. vanilla
Place honey-roasted peanuts in a food processor. Process until smooth, generally about 5 minutes (read Averie's post here for further information). Once the peanut butter is smooth, add vanilla and continue processing until well-combined. Transfer the peanut butter to a food-safe, covered container and refrigerate for later use.
Dark Chocolate Ice Cream
1 cup whole milk, divided
1 tablespoon plus 1 teaspoon cornstarch
2 ounces semi-sweet or bittersweet chocolate (I used semi-sweet chocolate chips)
1/4 cup heavy cream
1 cup evaporated milk
2/3 cup granulated sugar
2 tablespoons light corn syrup
1/3 cup Hershey's Special Dark cocoa
1/4 teaspoon salt
Mix 2 tablespoons of the milk with the cornstarch in a small bowl to create a slurry and set aside. Place the chocolate chips in a medium bowl and set aside. Fill a third large bowl with ice and water and set aside. Combine the remaining milk, cream, evaporated milk, granulated sugar and corn syrup in a medium-size saucepan and bring to a rolling boil over medium-high heat. Add the cocoa, whisking to incorporate, and boil for 4 minutes. Remove from the heat and whisk in the cornstarch slurry. Bring the mixture back to a boil over medium-high heat and cook, stirring with a spatula, until it is slightly thickened, about 1 minute. Remove from the heat. Gradually pour the hot milk mixture onto the chocolate. Add salt and whisk until the chocolate has melted and the ingredients are well-blended. Pour the liquid into a 1-gallon Ziploc freezer bag and seal. Submerge the bag in the ice bath you created earlier. Let stand about 30 minutes or until cold. Pour the ice cream base into the frozen canister of an ice cream maker and process according to the manufacturer's instructions, about 25 minutes. When the ice cream has finished mixing, remove the peanut butter from the refrigerator and spoon 1-2 tablespoons into the bottom of a 2 quart freezer-safe storage container. Pour some of the ice cream blend on top of the peanut butter. Alternate peanut butter and ice cream until the container is full. Press a sheet of parchment directly against the surface of ice cream and seal with an airtight lid. Freeze until firm, about 4 hours.
Saturday, June 15, 2013
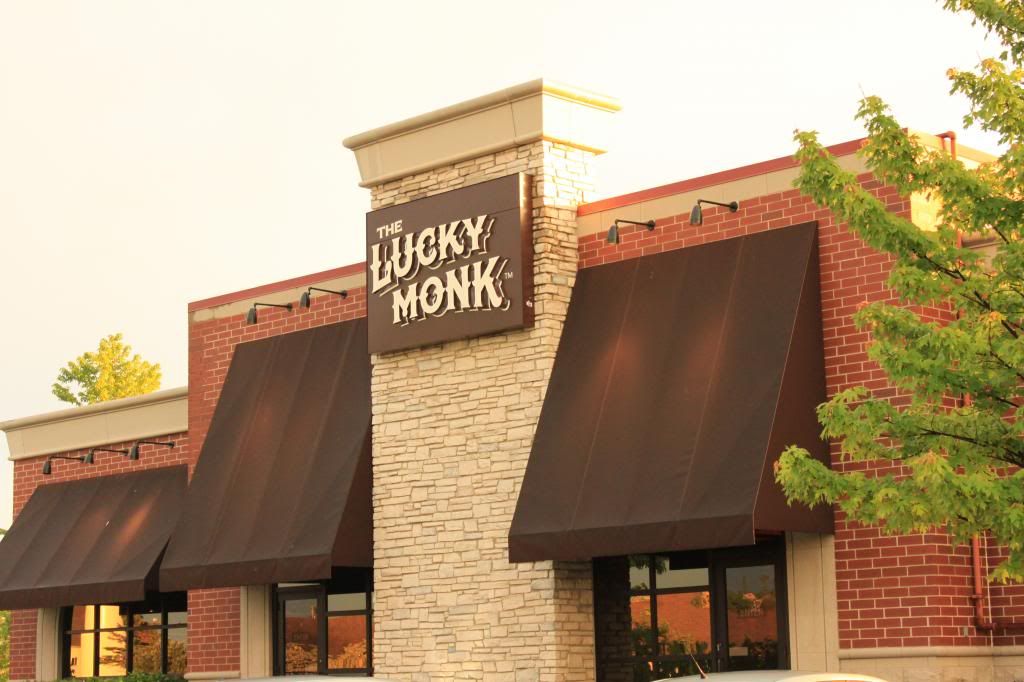
The Lucky Monk
Last week we had the most amazing meal. Mind you, it was completely unhealthy. But so utterly yummy.
My hubby had to make a quick trip into O'Hare for work, so Bubba and I tagged along. And any time we get the chance to have a meal out of town, I'm all over figuring out exactly where to go, researching menus and available cuisines. Thank goodness for the Internet.
Using TripAdvisor, to which I've actually submitted several reviews, I discovered The Lucky Monk. In the northwest Chicago suburb of South Barrington, it was located right near where we were planning to stay. It's a unique, local joint (one of our criteria when dining), serving pub-style meals like burgers, pizza, and fish and chips, as well as self-brewed beers (Hubby enjoyed the Solitude Stout). There were at least five things I could have ordered from their menu and been completely stuffed by.
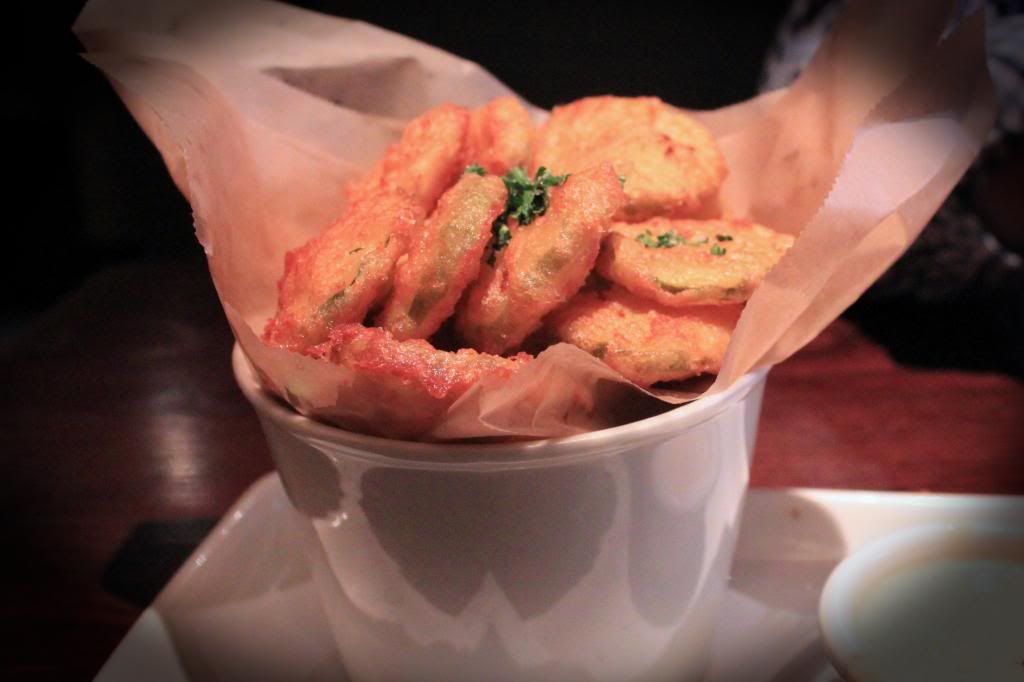
When I saw Pickle Fries on the menu, I was immediately thrilled. I've been on a quest for good pickle fries for I don't know how long. Luckily, Hubby was agreeable to ordering them as an appetizer so we could share. Perfectly crispy and served with a spicy ranch dressing, I could have eaten an entire order by myself. Certainly the best pickle fries I've come across yet.
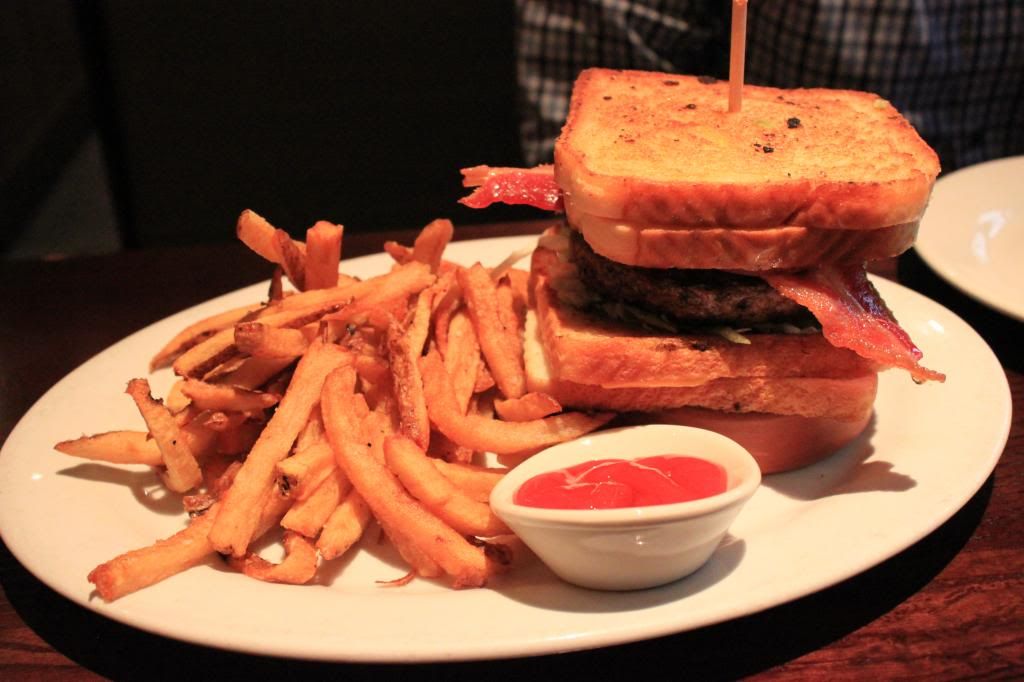
The Lucky Monk is known for their burgers, and rightfully so. Our main course was a Grilled Cheese Burger, a half-pound USDA Prime Beef burger between two bacon-stuffed grilled cheese sandwiches. It's served with their hand-cut fries, but we could have substituted Wisconsin cheese curds if we wanted (cholesterol much?). I die. Simply incredible. And easily shared. Wisely so.
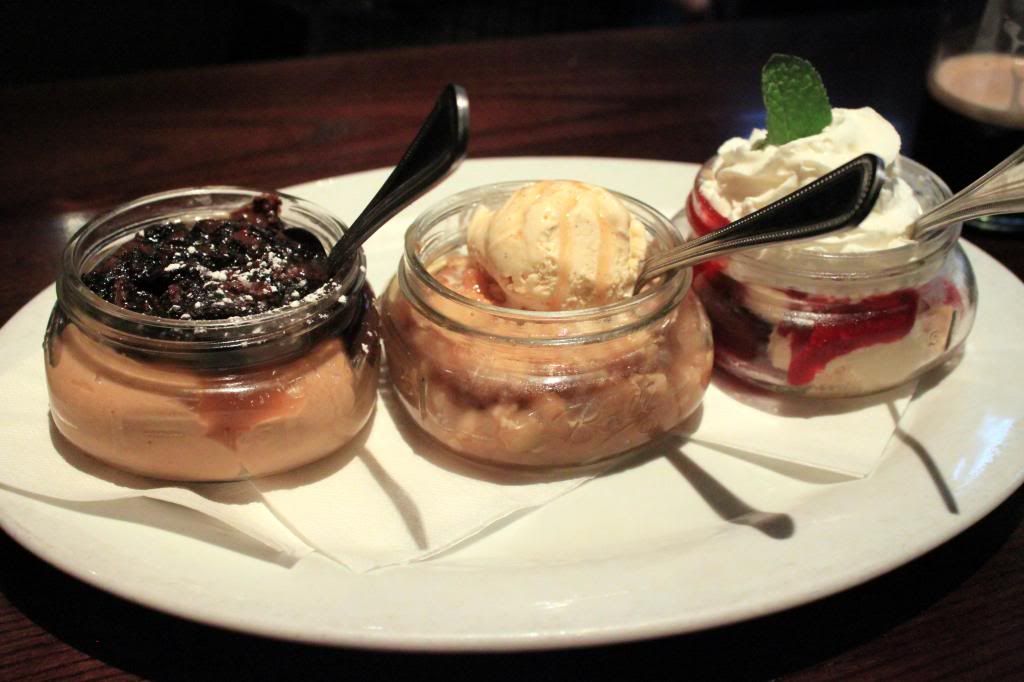
Then, because we hadn't consumed enough calories yet, we decided to go all out and order dessert. Yes, we did. We chose the Holy Trio of Mason Jar Sweets and picked Warm Apple Crisp, Peanut Butter Brownie, and Vanilla Raspberry Cheesecake. Hubby was enamored with the creamy deliciousness of the Peanut Butter Brownie (no shock there), but surprisingly, my favorite was the Warm Apple Crisp. I'm usually not big on baked apples, but this was perfectly spiced and the apples weren't mushy at all. Loved!! I even bought Mason jars at Target later that evening so I could attempt this fantastic-ness myself at home. Because I don't eat enough dessert already.
Needless to say, through no fault of The Lucky Monk and purely because of my sin of gluttony, I felt a bit ill later that night. Too. Much. Food. Eek. Can you imagine if we hadn't split everything?!
I can't wait to go back and try their Warm Pretzel Trio. And Crispy Fish Tacos. And Cookie Skillet. Shared, of course...
My hubby had to make a quick trip into O'Hare for work, so Bubba and I tagged along. And any time we get the chance to have a meal out of town, I'm all over figuring out exactly where to go, researching menus and available cuisines. Thank goodness for the Internet.
Using TripAdvisor, to which I've actually submitted several reviews, I discovered The Lucky Monk. In the northwest Chicago suburb of South Barrington, it was located right near where we were planning to stay. It's a unique, local joint (one of our criteria when dining), serving pub-style meals like burgers, pizza, and fish and chips, as well as self-brewed beers (Hubby enjoyed the Solitude Stout). There were at least five things I could have ordered from their menu and been completely stuffed by.
The Lucky Monk is known for their burgers, and rightfully so. Our main course was a Grilled Cheese Burger, a half-pound USDA Prime Beef burger between two bacon-stuffed grilled cheese sandwiches. It's served with their hand-cut fries, but we could have substituted Wisconsin cheese curds if we wanted (cholesterol much?). I die. Simply incredible. And easily shared. Wisely so.
Then, because we hadn't consumed enough calories yet, we decided to go all out and order dessert. Yes, we did. We chose the Holy Trio of Mason Jar Sweets and picked Warm Apple Crisp, Peanut Butter Brownie, and Vanilla Raspberry Cheesecake. Hubby was enamored with the creamy deliciousness of the Peanut Butter Brownie (no shock there), but surprisingly, my favorite was the Warm Apple Crisp. I'm usually not big on baked apples, but this was perfectly spiced and the apples weren't mushy at all. Loved!! I even bought Mason jars at Target later that evening so I could attempt this fantastic-ness myself at home. Because I don't eat enough dessert already.
I can't wait to go back and try their Warm Pretzel Trio. And Crispy Fish Tacos. And Cookie Skillet. Shared, of course...
Labels:
appetizer,
burgers,
dessert,
Mason jars,
review,
The Lucky Monk
Subscribe to:
Posts (Atom)